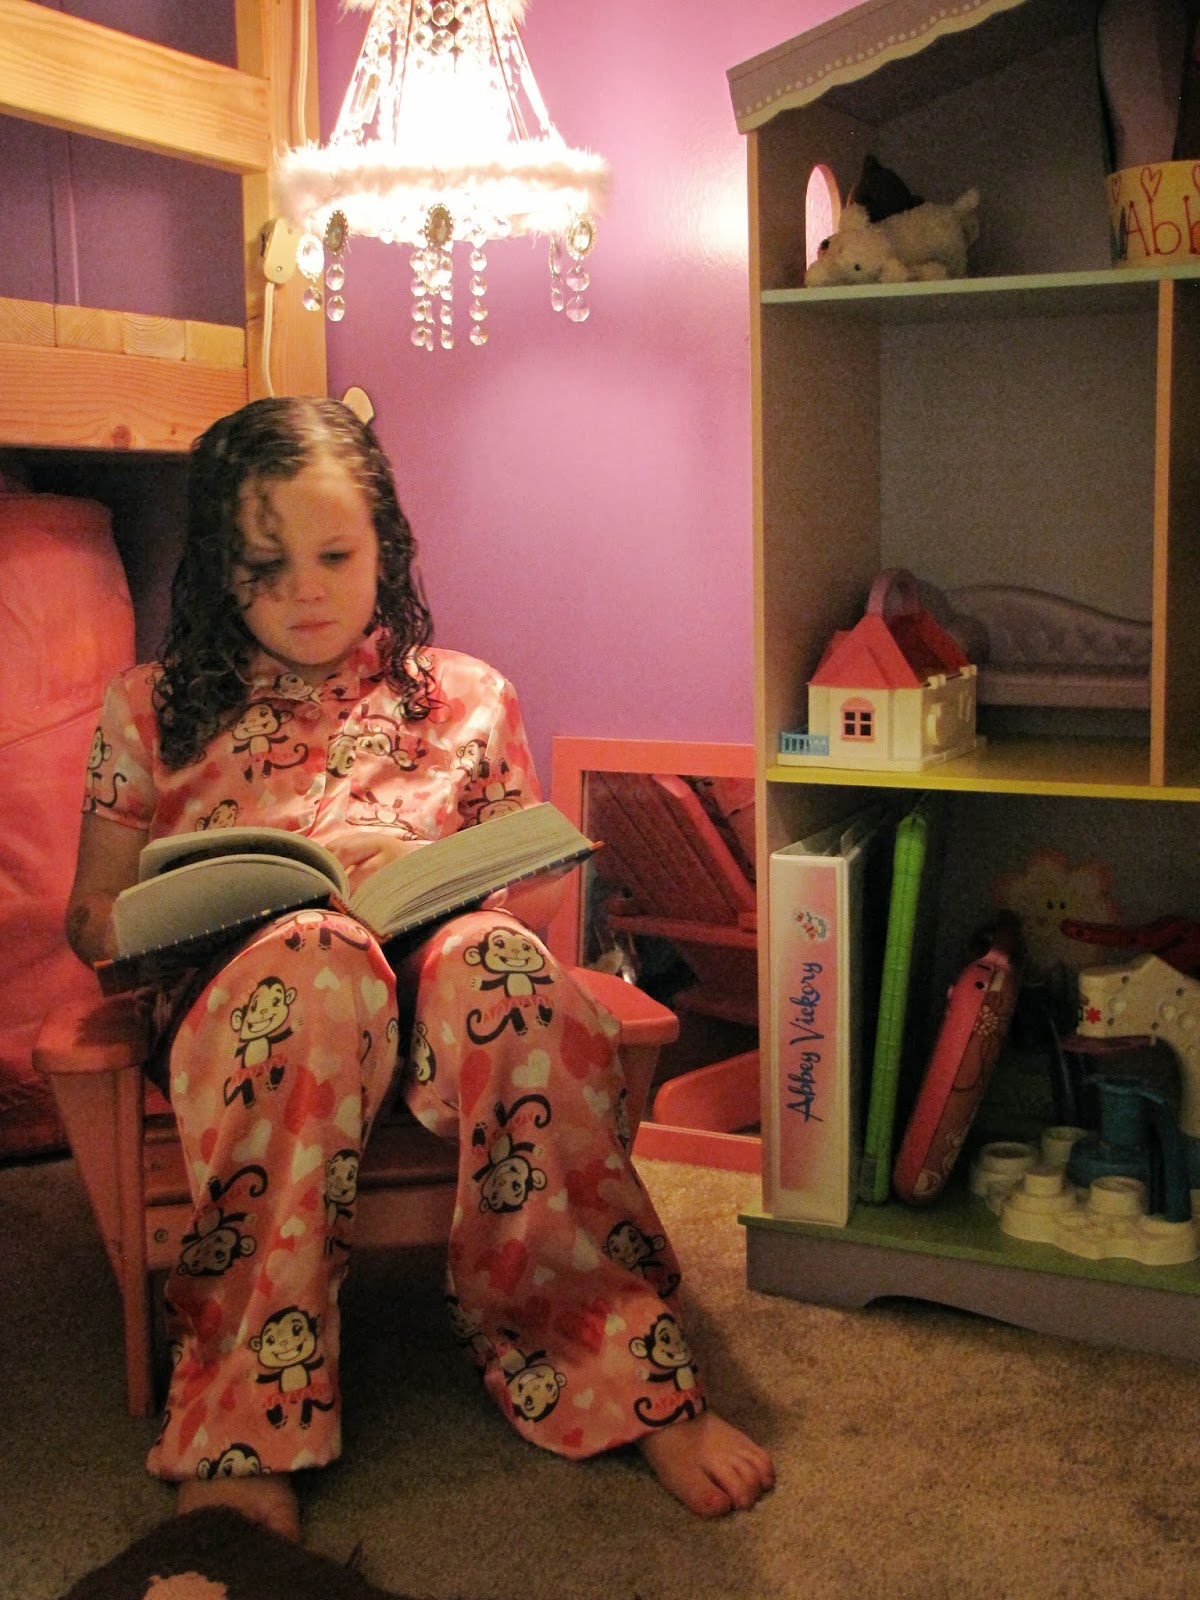
With the recent addition of a loft bed (see earlier post) in my daughter's room came much needed space that we were able to "double up" on. I wanted to turn the cubby space into a reading and play area where she could actually enjoy her room without all the clutter. We made her a reading bench (see earlier post) and I've moved her dollhouse bookshelf under there, next to her bright pink chair. The project that would complete her girly space was a little shabby chic hanging chandelier. I priced those suckers online and they cost waaay more than I wanted to spend. Plus they just weren't little-girly enough for my liking.
So, 'Project Chandelier' was born. First, the frame. I found the perfect thing: the old lampshade from the lamp we used in the nursery for both of our babies. It was one of my favorite lamps. I know... it's a lamp - what's the big deal?? You just don't get it. This thing was perfect for a baby's room... it was small, cream colored, had a 3-way touch base... I could turn it on to the lowest setting for those middle-of the-night diaper changes and rocking sessions. It saddened me the day it kicked the bucket. Now this shade will come full circle and be transformed into a shabby chic chandelier for the now 5-year-old little girl whose hiney it shone on last.
So here we go! This is how the shade looked before...
Then I had to get that cover off. It was glued on there to last 3 lifetimes! Took me about an hour to get it all off. This was the result...
Next, Papa welded the pieces together for us. Then Allen added the socket and wiring and painted it... pink, of course!
Now it's my turn! I get to decorate it and doll it up. I ordered some glass hanging bead crystals from Amazon for $11 for 6 ft of crystals. Yes, I found some cheaper, but these were glass and I knew they're be so sparkly. I mean, who wants a dull, somewhat sparkly chandelier? I wanted this thing to be blingy like diamonds.{I ended up ordering another set of them after applying the first set so it would be fuller.} Once I got the crystals on, I put a drop of hot glue on the ring at the top to secure it to the shade frame so they wouldn't move around. Here it is with the beads on it...
Time to add the pink ribbon and white feather fringe. I got both of these at Joann Fabric for pretty cheap. A little hot glue around the edge of the frame and that's all it took to secure them {my apologies for all the background clutter - the LR was a mess!}...
Allen put the chain on it so we could hang it and here it is!
Needless to say, she LOVES her little space now! Here are a few more pictures of the space now that it's done.
She actually slept on her sleeping bag in the cubby space last night. I woke up this morning to her doing a math workbook by the light of her new chandelier.
I'm sure my next post will have something to do with sweets... besides eating, baking is what I do best. :)
~Susan
Showing posts with label Kids' Rooms. Show all posts
Sunday, November 24, 2013
Sunday, October 27, 2013
Give a man some plans
Change is good, right? That's what I hear people say sometimes anyway. I'm not thrilled about a lot of major changes, but this minor one is MAJOR to me and I'm so excited about it!
A new view for Abigail
I'm always wanting to change things up in the kids' rooms. Mainly because their rooms are not very "roomy" in the way of space, yet they have so much stuff. Move this here, change this space up, add some storage bins here, etc. Just never really satisfied - especially in Abbey's room.
A while back I came across an amazing (did I say AMAZING??) site that has all kinds of free construction plans for whatever your heart desires. Allen has made me a buffet style cabinet from this same site. Fast forward to a couple of months ago when I saw a picture of a loft bed (probably on Pinterest) that would be so awesome in Abbey's room. I go to the link and it's THAT site I found a while back! Well, I sent him the plans immediately and the thought started to grow legs. I love the idea of the loft bed mainly because it doubles the space of the area! This quickly turned from a "I love this - how cute!" to a "We NEED this!" And so it began...
The original plan is for a twin bed, but I wanted something that would carry her through for several more years and have room for a friend to sleep over. So Allen had to convert the plans to a full sized bed instead. No big deal for him, thank God. {Side note: I have been blessed with a handy hubby.}
After he got everything measured, cut and clear coated, construction began. First, he got the frame put together. Papa was lending a couple of hands and Seth is supervising the activities.
Then he added a few more pieces (with some helpers)...
Now he's getting the platform and stair area added on...
Platform and stairs are done!
And below you'll see that Project Loft Bed is COMPLETE!
*Notice in the picture below, her old headboard is leaning against the bed. Her Dad made that from an old door and I painted it with a pretty purple 'A'. We are going to find a way to incorporate it into her room! Maybe even as a headboard of sorts. ;)
What a cute play area this creates under the bed! Every kid loves a place they can hide away and create a fort of sorts. The little reading bench Dad made her (Mimi and I made the cushion) a few weeks back is so cute under here, along with her little pink chair. :)
At this moment, the happy new bed owner is asleep with the butterflies (they hang from her ceiling).
If you want to venture out and make your child their very own loft bed, go to www.ana-white.com to check out these great plans!
The next project on my plate is to make a cutesy little chandelier from an old lampshade that was used in her room when she was a baby. It will hang from underneath her bed, over her chair. I've already started on it... stay tuned for a tutorial on that soon!
Until next time,
~S
A new view for Abigail
I'm always wanting to change things up in the kids' rooms. Mainly because their rooms are not very "roomy" in the way of space, yet they have so much stuff. Move this here, change this space up, add some storage bins here, etc. Just never really satisfied - especially in Abbey's room.
A while back I came across an amazing (did I say AMAZING??) site that has all kinds of free construction plans for whatever your heart desires. Allen has made me a buffet style cabinet from this same site. Fast forward to a couple of months ago when I saw a picture of a loft bed (probably on Pinterest) that would be so awesome in Abbey's room. I go to the link and it's THAT site I found a while back! Well, I sent him the plans immediately and the thought started to grow legs. I love the idea of the loft bed mainly because it doubles the space of the area! This quickly turned from a "I love this - how cute!" to a "We NEED this!" And so it began...
The original plan is for a twin bed, but I wanted something that would carry her through for several more years and have room for a friend to sleep over. So Allen had to convert the plans to a full sized bed instead. No big deal for him, thank God. {Side note: I have been blessed with a handy hubby.}
After he got everything measured, cut and clear coated, construction began. First, he got the frame put together. Papa was lending a couple of hands and Seth is supervising the activities.
Then he added a few more pieces (with some helpers)...
Now he's getting the platform and stair area added on...
Platform and stairs are done!
And below you'll see that Project Loft Bed is COMPLETE!
*Notice in the picture below, her old headboard is leaning against the bed. Her Dad made that from an old door and I painted it with a pretty purple 'A'. We are going to find a way to incorporate it into her room! Maybe even as a headboard of sorts. ;)
What a cute play area this creates under the bed! Every kid loves a place they can hide away and create a fort of sorts. The little reading bench Dad made her (Mimi and I made the cushion) a few weeks back is so cute under here, along with her little pink chair. :)
At this moment, the happy new bed owner is asleep with the butterflies (they hang from her ceiling).
If you want to venture out and make your child their very own loft bed, go to www.ana-white.com to check out these great plans!
The next project on my plate is to make a cutesy little chandelier from an old lampshade that was used in her room when she was a baby. It will hang from underneath her bed, over her chair. I've already started on it... stay tuned for a tutorial on that soon!
Until next time,
~S
Subscribe to:
Posts (Atom)